
Farms and ranches: fields, upgrades and cattle
A farm is two jobs: the building, then the fields. Until you lay field plots around it, a potato farm grows nothing at all. Fill it and buy its three cheap upgrades, and one farm on good soil made 69.3 potatoes a day. Cattle work the same way, except the ranch also needs a barn nearby, and you will want those cows sooner than you think: the next warehouse upgrade costs 15 of them.
Your new potato farm says 0 per day
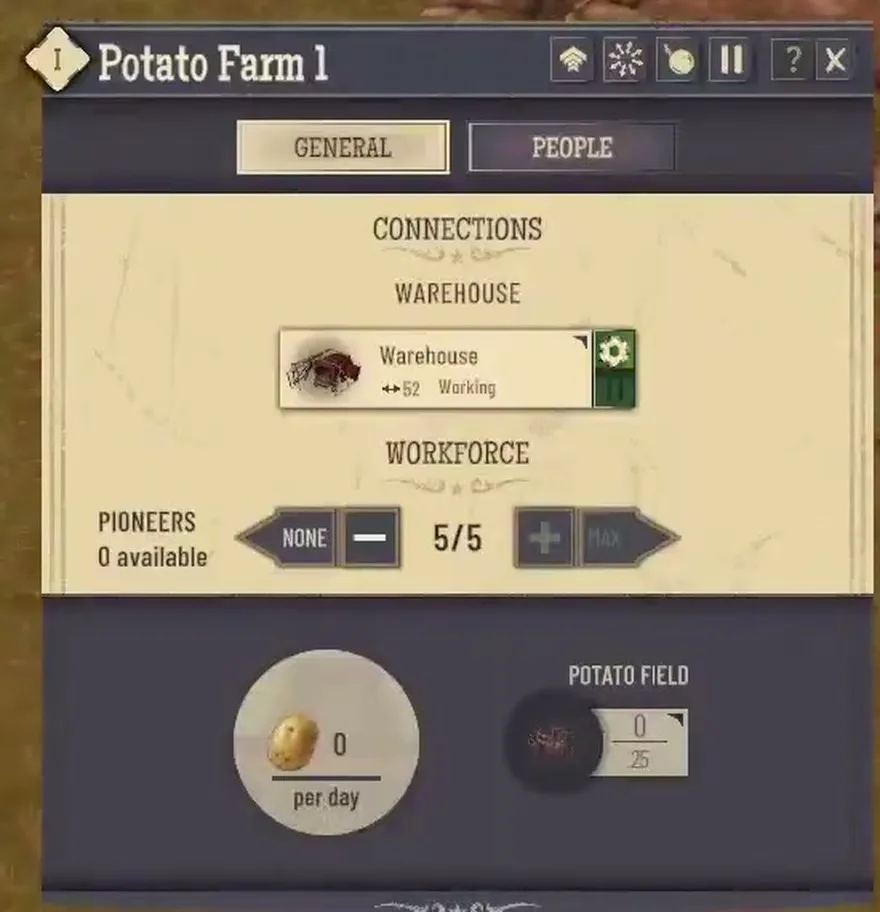
That is normal. Staffing the farm is not enough; the panel has a Potato Field counter, and every plot counted there has to be placed by you. Add the plots from the farm itself and lay them on open ground. Each one must touch the farm or a plot you already placed, otherwise the game refuses it with Requires adjacency to building.
A new farm starts with:
- 5 workers, set with the workforce arrows from your available pioneers.
- Room for 25 plots. Each plot is built separately, so you will see a construction notice for every one.
- A warehouse connection. The farm is listed under Connections with its warehouse, which is where the potatoes are delivered. How ranges work is on your first two hours.
Pick the spot before the first plot goes down. Once fields are in, the farm cannot be moved or torn down, and the plots cannot be removed; moving and demolishing has the details and the save-first trick.
The three upgrades, and what a full farm makes
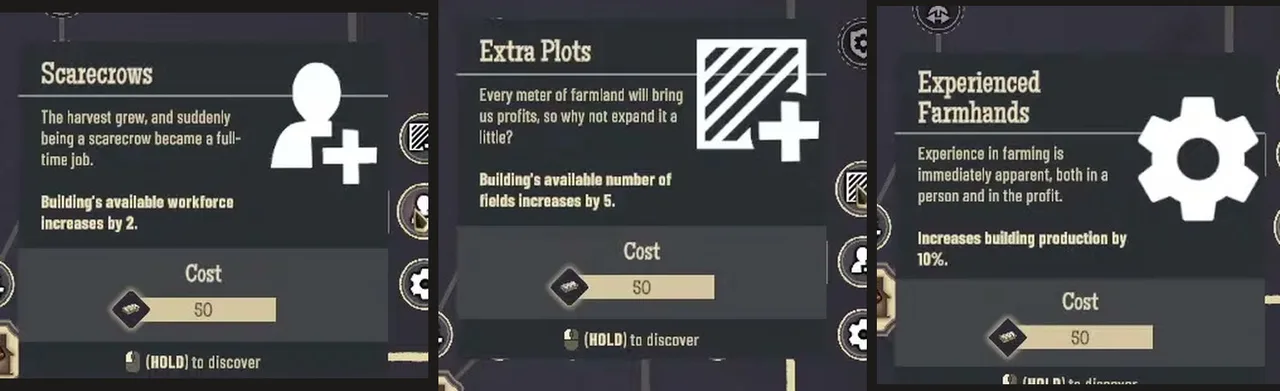
The potato farm’s three upgrades are ideas that cost 50 cash each. They are a cheap way to get more out of the farm you already have, so they are worth buying early.
| Upgrade | Cost | Effect |
|---|---|---|
| Scarecrows | 50 cash | Workers 5 → 7 |
| Extra Plots | 50 cash | Field plots 25 → 30 |
| Experienced Farmhands | 50 cash | Production +10% |
| All three | 150 cash | 7 workers, 30 plots; one farm showed 69.3 potatoes a day |
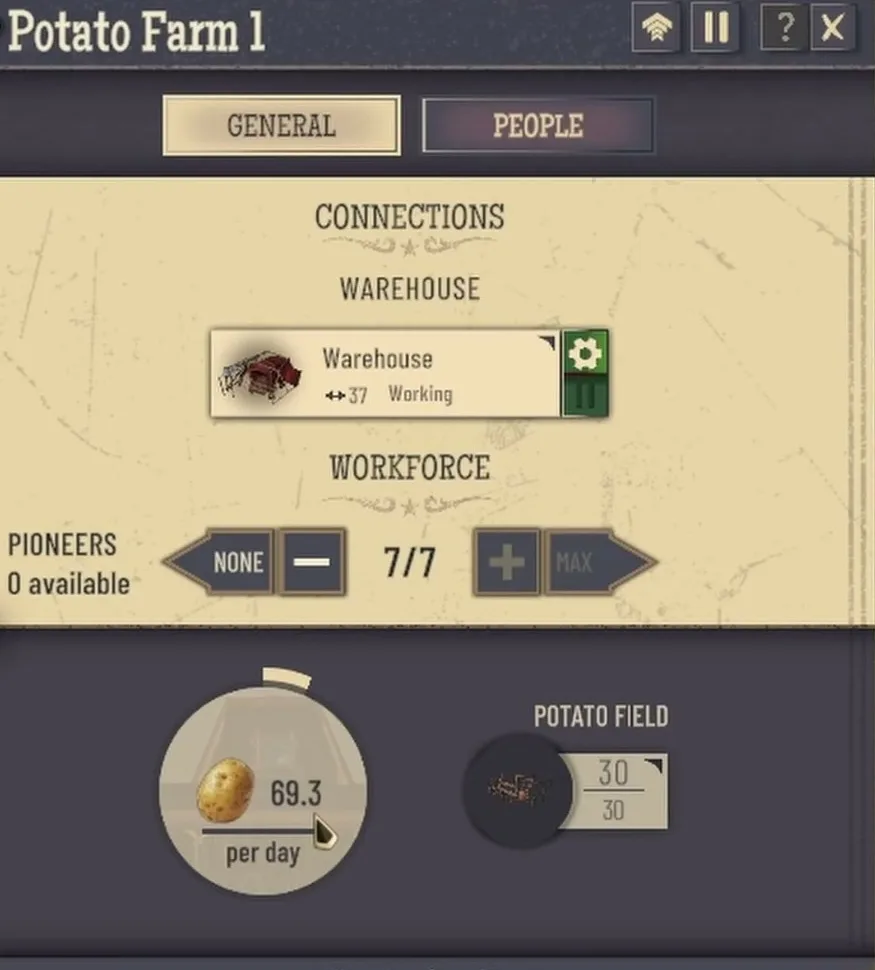
Extra Plots only helps once you actually lay the five new plots, so leave open ground on one side of the farm. Sometimes the production circle shows two numbers, such as 57.75 (69.3); the one in brackets looks like the full-rate figure and the other the current one, though the game does not say.
Soil quality
The map has a Soil Quality view that colours the ground around your settlement. One player’s advice is to put farms on the green ground for a better yield, and to keep them a little away from the warehouse, where the soil shows brown. That the colour changes the harvest is that player’s reading, not something the game spells out, but it costs nothing to check the view before you place the farm.
Corn
The Corn Farm is a separate idea costing 200 journey points (costs for every idea are on journey points and ideas). It has its own three upgrades. Two of them match the potato farm’s at double the price: Extra Cornfields, 100 cash for 5 more fields, and Irrigation Ditches, 100 cash for 10% more production.
What the crops are for
One player summed up the split: “You are growing potatos for moonshine and corn for bourbon”. Potatoes also go into soup, and mixing ingredients stretches them further. The same thread has the numbers: “I get 15 soup per cycle and it takes 3.5 of each ingredient vs getting 7 per cycle for just mushrooms and requiring 7 mushrooms.” The full food and drink chains are on food chains. Before you distil anything, read the Moonshine Scandal: brewing without a license carries a penalty, and that page covers the license offer.
Cattle: barn first, then the ranch
Both are ideas of their own, and the order matters.
- Unlock and build the Barn. The idea costs 200 journey points; the building costs 50 cash, 20 wooden parts and 40 planks. It stores cattle.
- Unlock and build the Cattle Ranch inside the barn’s range. The building costs 80 cash, 40 logs and 20 wooden parts.
- Click the ranch to add pens. The publisher’s explanation: “once it's built you have to click on it to add the cattle pens, similar to adding the potato fields. The ranch needs to be in range of the barn.”
Wooden parts come from the Carpenter’s Workshop, a Level II idea; see iron, stone and wooden parts. Ranches cannot be moved either; the Move button explains why.
What the cattle are for
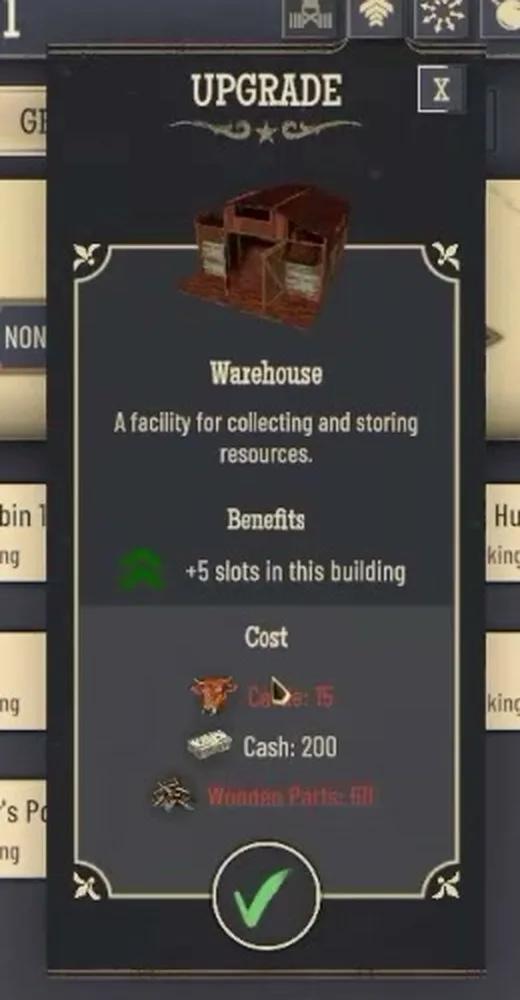
- Warehouse upgrade: +5 slots for 15 cattle, 200 cash and some wooden parts. Without a herd the upgrade stays out of reach, so start the barn and ranch before you need it.
- Cattle for Natives: a side quest that asks for 30 cattle, which players send from an icon above the Logistics building. See the natives quests.
- Stone, possibly. Players report that the stone quarry also needs cattle. That is not confirmed, but it is one more reason to start the herd early.
If a farm or ranch misbehaves
The potato farm stops mid-harvest. The production timer stops part way and the potatoes never arrive. An official forum account: “The potato farm stopping mid-harvest is a known issue the team is working on right now.” Their first suggestion: “Does restarting the game get it going again?” Saving and restarting is worth a try. If your kitchen runs dry meanwhile, one player suggests switching it to a soup recipe without potatoes.
The barn shows no cattle. One player reports the barn’s panel does not list its herd, while the count at the top of the screen does. Check the top bar before assuming the ranch is idle.
The farm is in the wrong place. There is no fix after the fields are in. Other stalls and their workarounds are collected on crashes and bugs.